Archive for May 2nd, 2013
RAV4 Android Radio Install
by balleman on May.02, 2013, under Computers, Linux
A brief description of installing my Android 2DIN radio in my 2011 RAV4 w/ JBL.
Parts List
- Pure Android 2 DIN Radio (Generic or Ouku TH8581GA)
- USB WiFi dongle, included with the radio.
- Scosche TA2055B – RAV4 DIN Mounting Kit (ad)
- PAC TATO
(ad) – kit to integrate with factory amplifier
- AmazonBasics USB 2.0 4-Port Ultra Mini Hub (ad)
- ELM327 USB OBDII Adapter (ad)
- Short USB extension cable (ad)
- Solder, heat shrink tubing
- RTL2832U SDR USB dongle
Tools
- Plastic putty blade
- 10mm bolt driver
- Soldering iron
- Heat gun
Wiring Harness
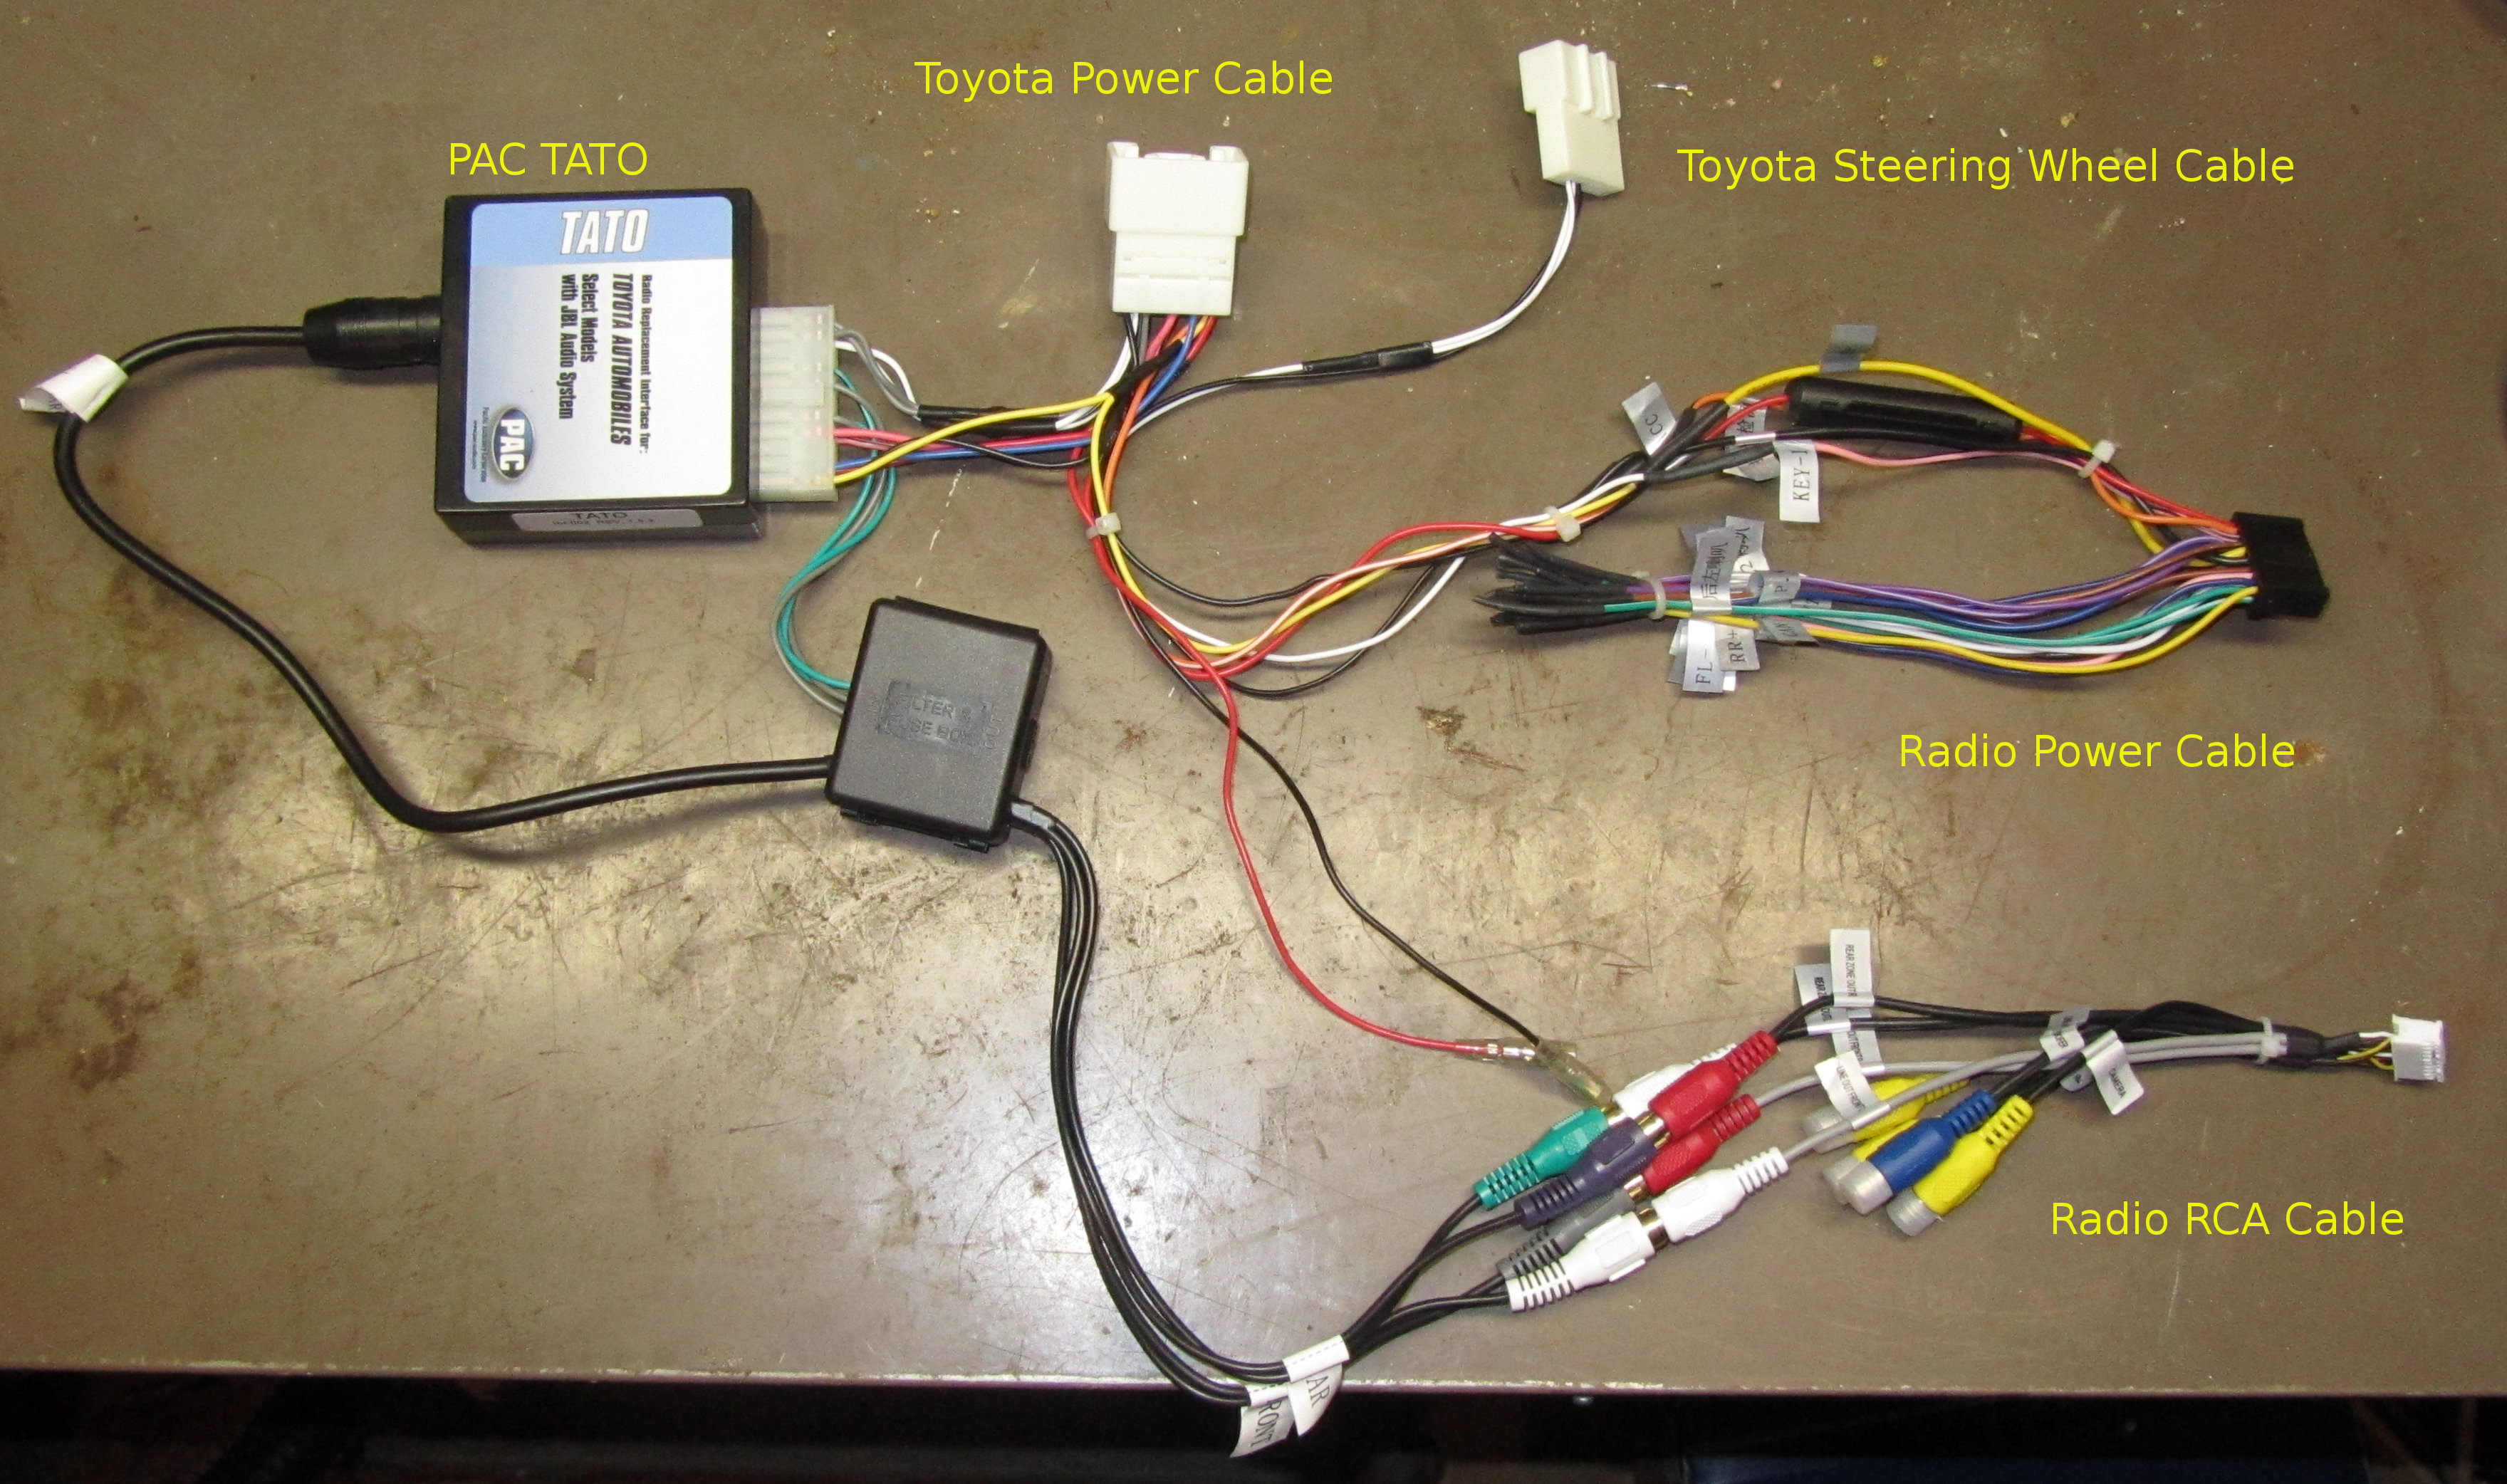
Since I have the JBL audio system in the RAV4, I purchased a PAC TATO (ad) which included the necessary wiring harness, in addition to providing the signaling to turn on the factory amplifier. I connected the ground, accessory, battery, accessory, and illumination wires between the TATO harness and the radio harness. The TATO also came with an adapter to connect a PAC steering wheel control converter to the separate Toyota harness with those connections. I experimented and determined that the steering wheel control wire on the radio harness worked properly with the white wire on this harness, so I cut it off and wired it in. I soldered all connections and covered them with heat shrink tubing, also using heat shrink tubing to cover the unused wires that were not already covered.
The radio harness had no connections for a microphone, and I was not able to easily find a harness that supported the RAV4’s factory microphone or AUX input.
Old Radio Removal
I removed the trim panels using a plastic putty spreader that I had laying around. It was a little tough to get it inserted initially, but it did the job with no noticeable marking. After removing the trim panels, I detached the cables to them and set them aside. I then used the bolt driver to remove the 4 bolts to the radio and removed it, and then detached the radio from its cabling. In the course of repeating this several times (playing with the new radio), I ended up losing one of the bolts – so do better than me, and keep a tight grip on them or use a magnetic tool. You can watch this video of someone else removing the radio in a RAV4.
Placement of New Hardware
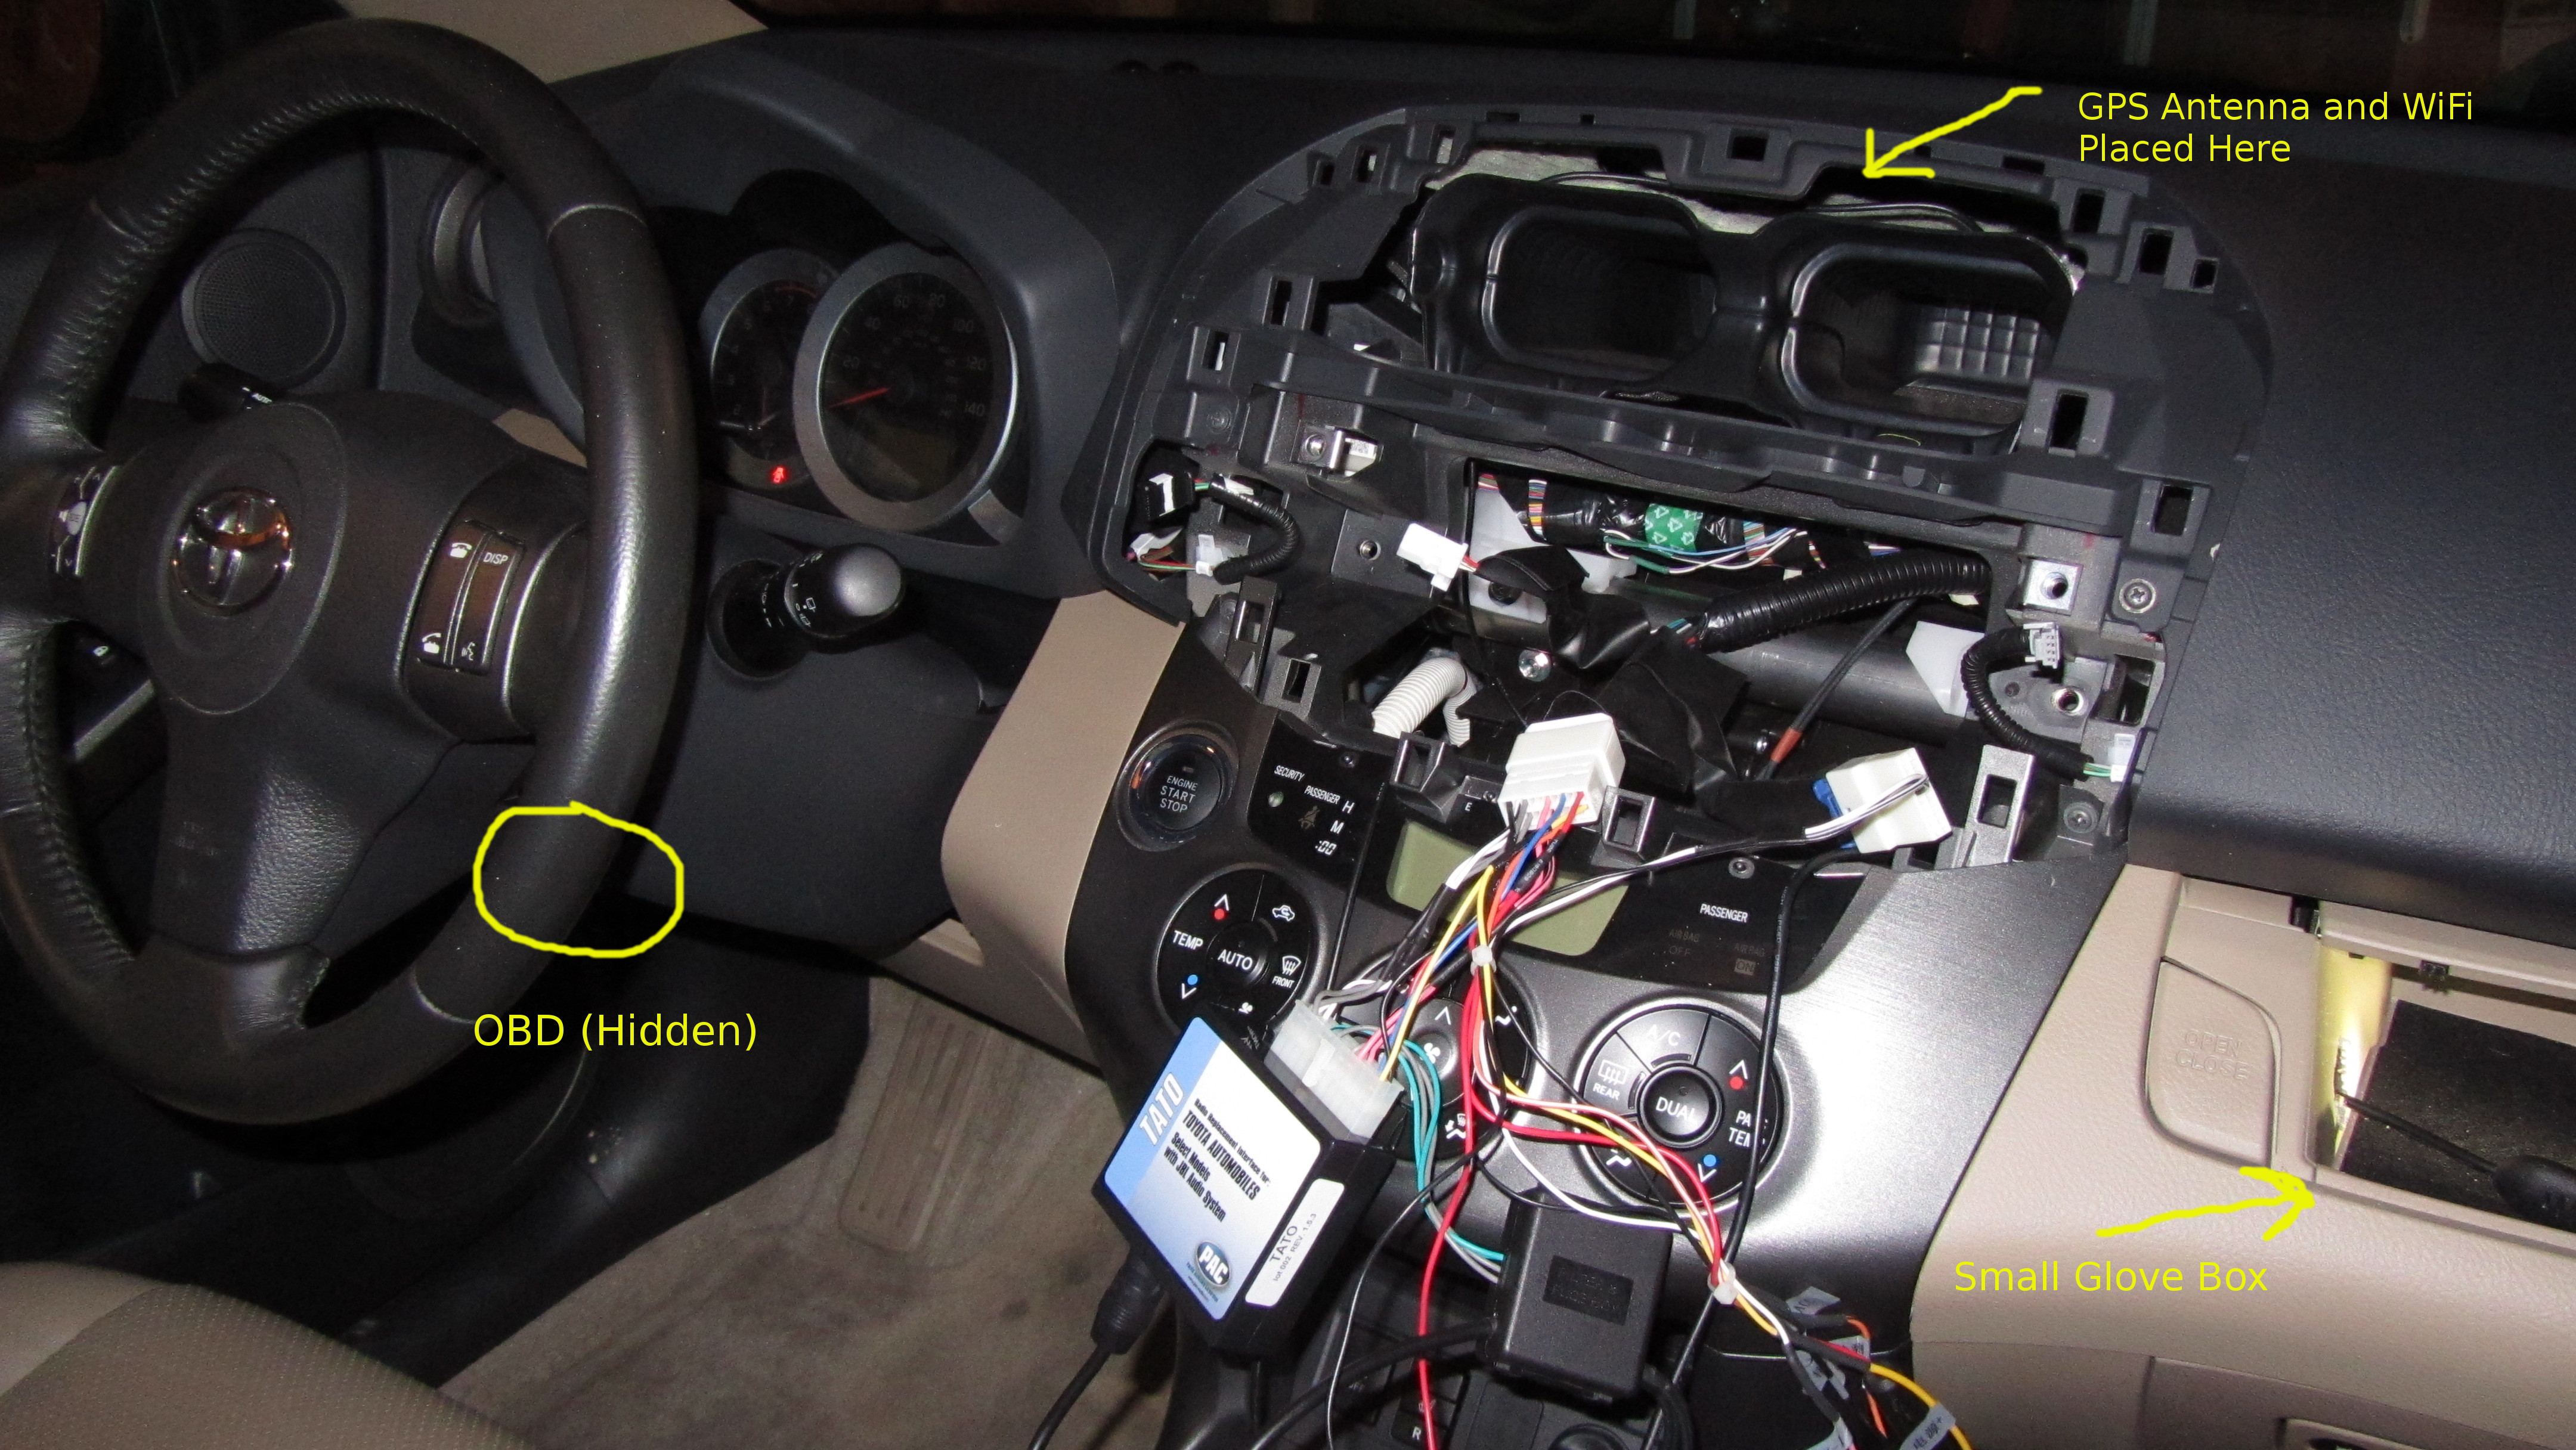
There is a good amount of space in the center console that easily accommodated the radio and associated wiring. The RAV4 also has a small secondary glove box above the main glove box. I chose this location to place the USB hub (in order to have it accessible), so I cut a hole in the glove box towards the center console. I routed the USB cable from the radio, as well as the AUX A/V RCA inputs, to the glove box. I also observed a void above the center air vents, above some insulation, that was readily accessible. In this space I placed the GPS antenna as and the WiFi USB dongle on an USB extension cable that was routed to the glove box. The OBDII adapter was attached to the OBDII port and the cable routed in the lower driver’s side dash into the center console, and from there to the glove box, the provided cable being sufficient.
SDR Notes
I also purchased and adapter and splitter for connecting the SDR dongle to the factory AM/FM antenna, but its performance was very poor when trying to receive weather band frequencies. I also tried placing the antenna that came with the SDR dongle in the same location as the GPS antenna, but it also performed poorly. For now, the provided antenna is stowed in the glove box, and can be used somewhat effectively when magnetically attached near the sunroof.
Finishing
With the radio attached to the RAV4 mounting kit, it fit easily back into the dash, and looks pretty good. Up next… software.

